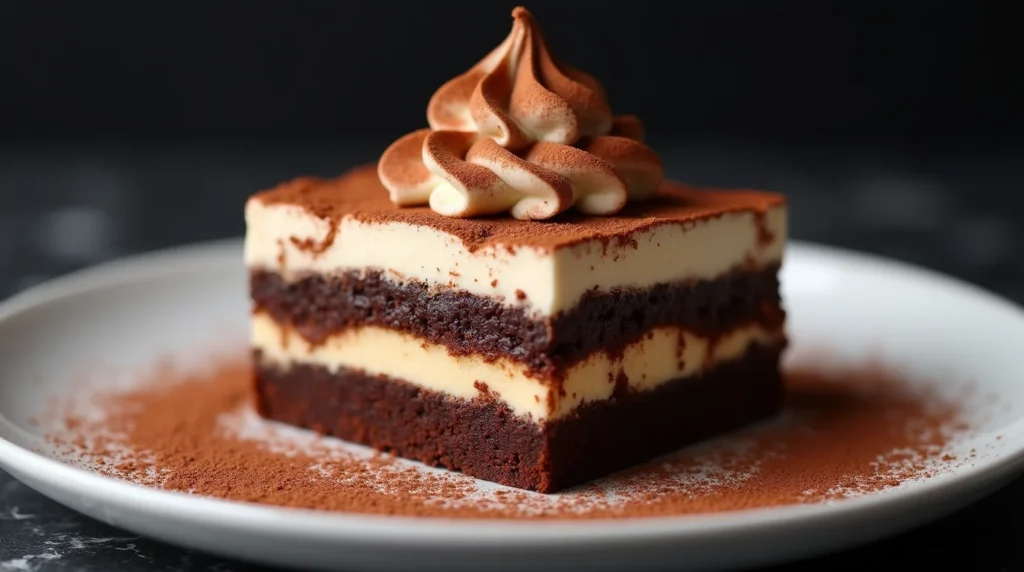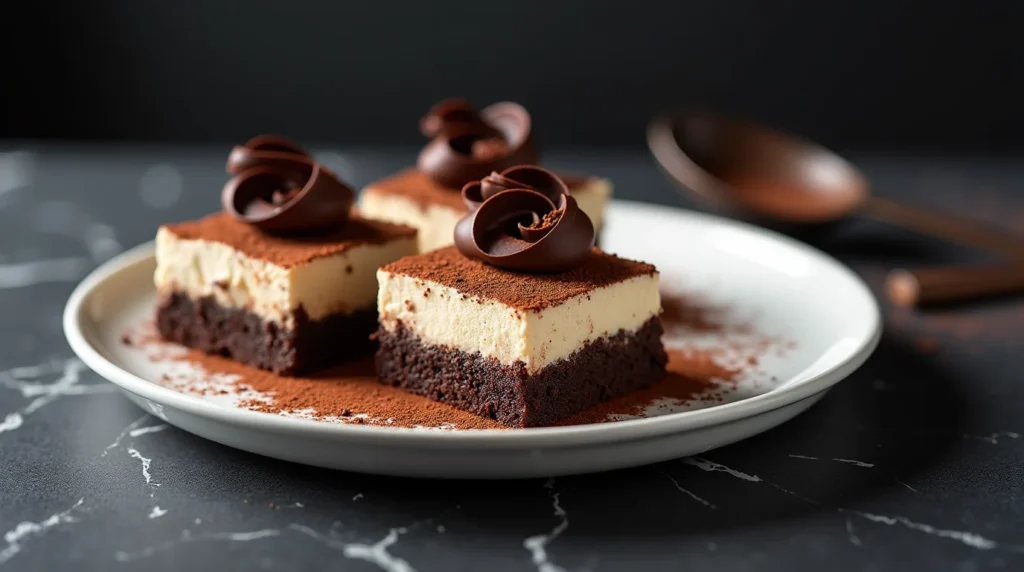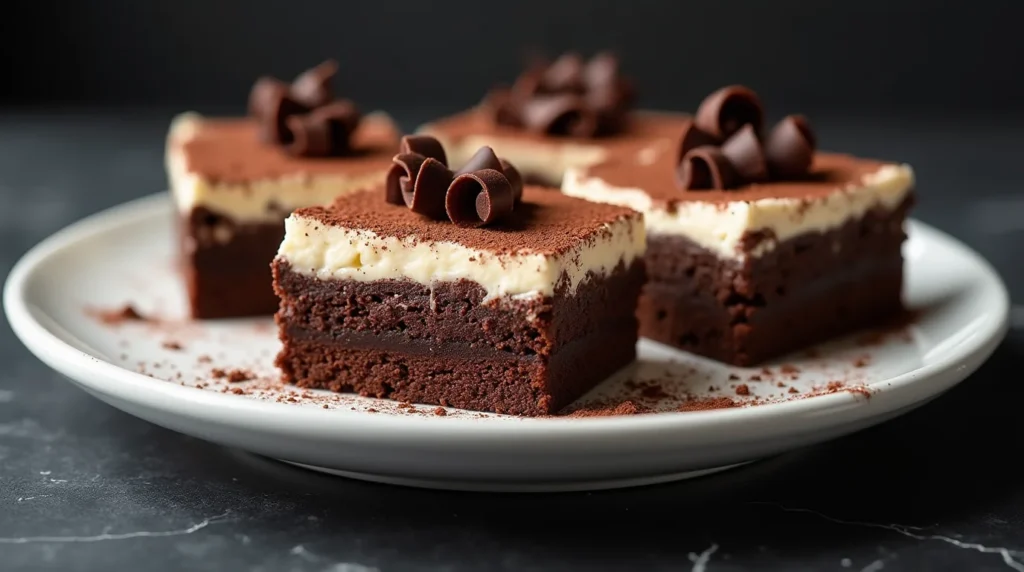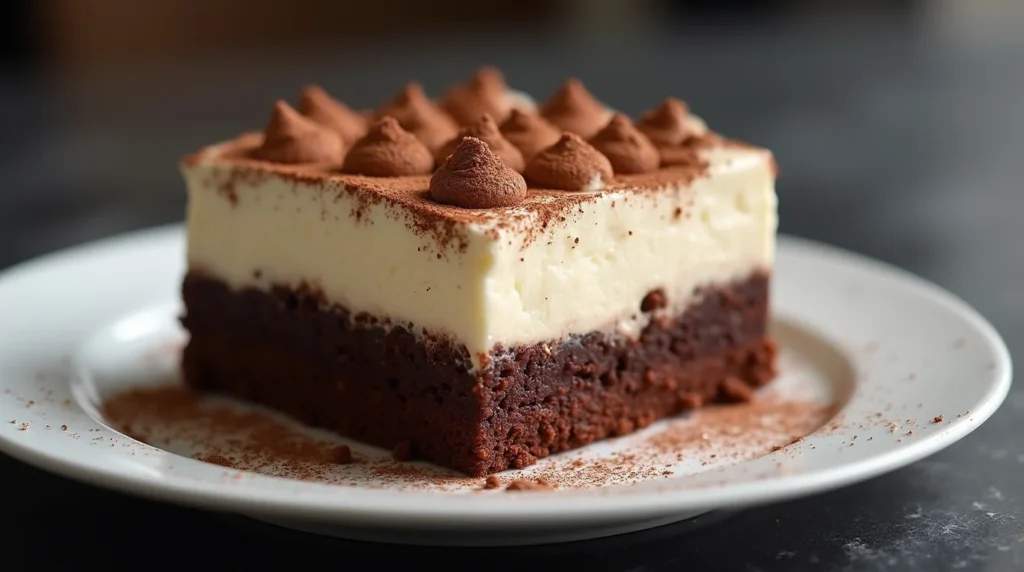
How to Make Decadent Tiramisu Brownies – A Delightful Treat for Every Chocolate Lover!
Share this recipe
Ever had a dessert that felt like a warm hug? These tiramisu brownies do just that. The chocolate and coffee layers create an unforgettable taste. We’re excited to share this recipe with you!
These brownies are perfect for any time. They’re great for cozy nights or sunny afternoons. They’re ideal for dates, family get-togethers, or just when you need something sweet. Let’s explore this chocolate delight together!
Key Takeaways
- Transform simple ingredients into a show-stopping dessert.
- This recipe is accessible to both novice and seasoned bakers.
- Combines the richness of brownies with the classic flavors of tiramisu.
- Perfect for various occasions, from intimate dinners to festive gatherings.
- Engages all your senses with its rich chocolate and creamy coffee notes.
Introduction to Tiramisu Brownies
Welcome to the world of tiramisu brownies! These brownies are a mix of moist, chocolatey goodness and the creamy layers of tiramisu. They’re a fusion of two favorite desserts.

This treat is a dream for chocolate lovers. It combines the richness of brownies with the creamy layers of tiramisu. This tiramisu brownies recipe is easy to follow, making it fun for everyone.
Picture the softness of brownies with the smoothness of mascarpone and a touch of coffee. It’s a perfect combination! These brownies are great for any event, from casual gatherings to fancy dinner parties. So, let’s start making this amazing dessert!
Ingredients Needed for Tiramisu Brownies
Before we start mixing and baking, let’s get all the tiramisu brownies ingredients ready. We’ll cover three parts: the essential brownie ingredients, the tiramisu layer ingredients, and some optional add-ons for extra decadence!
Essential Brownie Ingredients
- 1 cup unsalted butter, melted
- 1 1/2 cups granulated sugar
- 1 cup all-purpose flour
- 3/4 cup unsweetened cocoa powder
- 1/2 teaspoon baking powder
- 1/2 teaspoon salt
- 2 large eggs
- 2 teaspoons vanilla extract

Tiramisu Layer Ingredients
- 8 oz mascarpone cheese
- 1/2 cup heavy cream
- 1/4 cup granulated sugar
- 1/4 cup brewed espresso
- 2 tablespoons dark rum (optional)
- 1 tablespoon cocoa powder (for dusting)
Optional Add-Ons for Extra Decadence
Want to make your decadent tiramisu brownies even better? Here are some classic tiramisu flavors and extras you can add:
- Chocolate chips or chunks
- Kahlua or other coffee liqueurs
- White chocolate drizzle
- Crushed ladyfinger biscuits for extra crunch
Choosing the Right Chocolate for Tiramisu Brownies
Let’s talk about the star ingredient that turns a simple brownie into the best tiramisu brownies ever: chocolate! Choosing the right chocolate is key. It can take your homemade dessert to new heights. So, which chocolates should you pick, and which brands will give you the best results? Let’s explore!
Types of Chocolate to Consider
For the best tiramisu brownies, knowing the different types of chocolate is crucial:

- Unsweetened Cocoa Powder: Great for a strong, chocolatey taste without extra sugar.
- Dark Chocolate: Rich and slightly bitter, it gives a deep, intense flavor.
- Semi-Sweet Chocolate: Perfect for those who like a balanced chocolate taste that’s not too strong.
Best Brands for Homemade Brownies
To make the best tiramisu brownies, use quality chocolate for baking. Here are some top brands to consider:
- Ghirardelli: Known for its premium quality, Ghirardelli’s baking chocolate is a reliable choice for intense flavors.
- Valrhona: A favorite among professional bakers, Valrhona delivers unparalleled richness and smoothness.
- Guittard: This brand offers a variety of baking chocolates that are perfect for a luxurious, homemade dessert experience.
By picking the right type and brand of chocolate, you’re on your way to making the best tiramisu brownies. They’re sure to impress!
Preparing the Brownie Layer
Ready to get baking? Let’s start the magic! We’ll guide you through making the perfect brownie layer. You’ll learn how to get that chewy-yet-fudgy texture everyone loves. Get ready to bake the ultimate base for your tiramisu brownies.
Step-by-Step Guide
- Preheat your oven to 350°F (175°C) and grease a baking pan.
- In a medium bowl, whisk together the dry ingredients: flour, cocoa powder, and salt.
- Melt the butter and chocolate together in a microwave-safe bowl or over a double boiler. Once melted, mix in the sugar until well combined.
- Add eggs one at a time, beating well after each addition to ensure a smooth mixture.
- Stir in the vanilla extract.
- Gradually fold in the dry ingredients into the wet mixture until just combined.
- Pour the batter into the prepared pan, spreading it out evenly.
- Bake for 20-25 minutes or until a toothpick inserted into the center comes out with a few moist crumbs. Allow to cool completely before adding the tiramisu layer.
Tips for Achieving the Perfect Brownie Texture
- Don’t overmix the batter: Overmixing can lead to dense, tough brownies. Mix until just combined.
- Use high-quality chocolate: The flavor and texture largely depend on the chocolate used, so opt for premium brands like Ghirardelli or Lindt.
- Watch the baking time carefully: Begin checking your brownies a few minutes before the suggested baking time. The perfect brownie texture is achieved when the center is set but slightly gooey.
- Let them cool completely: Patience is key! Letting your brownies cool completely will set the texture and make layering easier.
With these guidelines, making brownies becomes easy! Happy baking!
Making the Tiramisu Layer
Let’s explore the magic of the tiramisu layer. Here, our brownie base gets a fancy upgrade. We add a creamy mascarpone mixture and aromatic espresso. This mix creates that beloved coffee-flavored dessert we all love! Ready to start? Let’s do this!
- First, gather your ingredients: mascarpone cheese, sugar, eggs, and strong espresso.
- In a mixing bowl, whisk the egg yolks and sugar until they form a pale, fluffy mixture.
- Gently fold in the mascarpone cheese, creating a smooth and creamy mascarpone mixture.
- Prepare your espresso and let it cool to avoid curdling the mascarpone. Once cool, gradually incorporate it into the mascarpone mixture.
Tip: For the best tiramisu layer preparation, ensure all ingredients are at room temperature before you start. This helps everything blend together seamlessly!
- Once your creamy mascarpone mixture is ready, spread it evenly over the brownie base.
- Chill the entire assembly in the refrigerator for at least 2 hours, allowing flavors to meld together and the tiramisu layer to set perfectly.
And that’s it! With these steps, you’ve mastered the art of making a tiramisu layer. You’ve created a deliciously creamy, coffee-flavored dessert that’s sure to impress.
Combining Layers for Tiramisu Brownies
Making tiramisu brownies is all about layering. It’s what turns a simple dessert into a masterpiece. By mastering layering, we get a mix of flavors and textures in every bite. Let’s make the best tiramisu brownies you’ve ever had!
Layering Techniques for Best Results
Here are some expert tips for layering:
- Start with the brownie base: Pour the brownie batter into the dish and spread it out. This is the base of your dessert.
- Add the coffee-soaked ladyfingers: Soak each ladyfinger in coffee well. This adds the tiramisu flavor to the brownie.
- Spread the creamy mascarpone layer: Put a thick layer of mascarpone cheese over the ladyfingers. It makes the dessert rich and creamy.
- Repeat the layers: You can add more layers if your dish is deep. It boosts the flavors and textures.
How to Balance Flavors
To make a balanced tiramisu dessert, we need to balance the flavors. Here’s how:
- Use quality ingredients: Choose the best chocolate and coffee for a rich taste.
- Moderate sweetness: Don’t make the brownies too sweet. Balance the sugar with the coffee’s bitterness and mascarpone’s tang.
- Even layering: Spread each layer evenly and with the same thickness. This prevents one flavor from overpowering the others.
By following these tips, we can make authentic tiramisu brownies that are both delightful and delicious. Happy baking!
Baking Instructions for Tiramisu Brownies
It’s time to bring your delicious creation to life! Once you’ve layered your brownies and tiramisu, follow these steps. This will ensure your *chocolate tiramisu delight* is perfect.
- Preheat your oven to 350°F (175°C). An even temperature is key for optimal results!
- Place your tiramisu brownie tray in the center of the oven. This ensures even cooking and avoids burnt edges.
- Bake for 25-30 minutes. Keep an eye on your dessert, as oven times may vary. You’ll know it’s done when a toothpick comes out with a few moist crumbs.
The kitchen is about to be filled with the irresistible aroma of baking coffee and chocolate! Use this *dessert baking guide* to make sure every batch is a masterpiece.
Tips to Prevent Overbaking
Ever waited for your homemade tiramisu brownies to come out only to find them dry? Don’t worry! With these easy tips, you’ll make perfect brownies every time. Let’s get started!
- Use a Timer: Set a timer as soon as you put your brownies in the oven. This keeps you from overbaking.
- Check for Doneness Early: Check your brownies a few minutes before they’re supposed to be done. A toothpick should come out with a bit of moist crumb.
- Monitor Oven Temperature: Make sure your oven is at the right temperature with an oven thermometer. Small changes can cause overbaking.
- Use the Right Pan: Choose a light-colored, metal pan for even baking. Glass or dark pans can overbake the edges.
- Let Them Cool in the Pan: Brownies will bake a bit more as they cool. Let them cool in the pan to avoid drying out.
With these tips, you’re ready to make moist and tasty tiramisu brownies. Happy baking, and enjoy your delicious creations!
How to Make Coffee-Infused Syrup
The coffee-infused syrup is a key ingredient that adds a rich coffee flavor to our desserts. It’s made with just a few simple ingredients. This syrup is easy to make and brings a unique flavor to your treats.
Ingredients for Coffee Syrup
To make this tasty syrup, you’ll need:
- 1 cup of freshly brewed espresso or strong coffee
- 1/2 cup granulated sugar
- 1 tsp vanilla extract
Preparation Methods
Are you ready to make your own coffee-infused syrup? Here’s how:
- Combine Ingredients: In a medium saucepan, mix the espresso, sugar, and vanilla extract.
- Simmer: Heat the mixture over medium heat, stirring often to dissolve the sugar.
- Reduce: Simmer until it thickens a bit, about 10-15 minutes. Watch it closely to avoid burning.
- Cool: After cooling, store it in a jar for easy use.
Now that your syrup is ready, you can make your desserts even better. Use it in your tiramisu or as a sweetener for your coffee. Enjoy!
Preparing the Cream Cheese Mixture
Let’s start making a fantastic cream cheese mixture for our tiramisu brownies! This layer will make your dessert even better. We’ll get all our ingredients and tools ready. Then, we’ll mix everything step by step for the best results!
Ingredients and Tools Required
- 16 oz cream cheese, softened
- 1 cup powdered sugar
- 2 tsp vanilla extract
- 2 large eggs
- Medium-sized mixing bowl
- Electric mixer or whisk
- Spatula
Step-by-Step Mixing Process
- Soften the cream cheese: Let the cream cheese sit at room temperature for 30 minutes. This makes it easier to mix.
- Combine ingredients: In the mixing bowl, put the softened cream cheese, powdered sugar, and vanilla extract.
- Begin mixing process: Use an electric mixer or whisk to beat the ingredients until they’re smooth and creamy.
- Add eggs: Add the eggs one at a time, beating well after each egg. This ensures they’re fully mixed in.
- Check the consistency: Make sure the cream cheese mixture is smooth with no lumps. This is key for a great tiramisu cream layer.
And that’s it! Your cream cheese mixture is now ready to be layered into your tiramisu brownies. This layer adds a luxurious texture and flavor we all adore.
Adding Toppings to Your Tiramisu Brownies
Let’s take your Tiramisu Brownies to the next level with some creative and delicious toppings! It’s all about enhancing brownie flavors to make a unique and decadent dessert. Here are some ideas for tiramisu brownies toppings, giving them a personalized dessert touch!
- Shaved Chocolate: Sprinkle dark or white chocolate shavings on top for an elegant touch.
- Cocoa Powder: A dusting of unsweetened cocoa powder not only looks beautiful but also intensifies the rich, chocolatey flavor.
- Sea Salt: A sprinkle of sea salt can contrast beautifully with the sweetness, enhancing brownie flavors magnificently.
- Coffee Beans: Crushed or whole coffee beans add a burst of robust coffee flavor to your tiramisu brownies.
- Nuts: Chopped walnuts, pecans, or almonds for a crunchy twist and an added layer of complexity.
- Fresh Berries: Top with fresh raspberries, strawberries, or blueberries for a refreshing contrast to the rich, chocolate base.
- Whipped Cream: Add a dollop of homemade whipped cream for an extra creamy delight.
Feel free to mix and match these tiramisu brownies toppings! Experimentation is key when it comes to adding a personalized dessert touch. Whether you prefer a classic topping or want to be adventurous, enhancing brownie flavors has never been this fun and rewarding! Let’s create something extraordinary together!
Storage Tips for Tiramisu Brownies
To keep your tiramisu brownies fresh and tasty, follow these smart storage tips! Discover the top methods for keeping your brownies fresh.
Here’s what we recommend for optimal *dessert freshness*:
- Room Temperature: Store your tiramisu brownies in an airtight container at room temperature for up to two days. This helps maintain their *moisture and flavor* without refrigeration.
- Refrigeration: For longer freshness, place them in the fridge. Ensure they are well-covered to prevent drying out. With proper refrigerator storage, they’ll stay moist and delicious for up to a week!
- Freezing: If you need to store them even longer, freezing is an option. Wrap them individually in plastic wrap and then place in a freezer-safe container. They’ll keep well for up to three months. Just thaw at room temperature before enjoying them!
With these useful tips, your tiramisu brownies will always impress. Enjoy them whenever you want!
Serving Suggestions for Tiramisu Brownies
Serving tiramisu brownies is a joyous experience ! To make it spectacular, make sure the layers are clear and the flavors are just right. Here are some fabulous tips to make your tiramisu brownies unforgettable:
- Chill and Then Warm Up: Chill the tiramisu layer until the mascarpone sets. Then, bring them to room temperature before serving. This keeps the layers together and boosts the flavor.
- Thoughtful Plating: For a stunning look, cut clean squares or rectangles with a sharp knife. Place them neatly on a plate with cocoa or coffee syrup for extra flair.
- Temperature Tips: Let the brownies sit at room temperature for 30 minutes before serving. This makes them perfect for your guests to enjoy.
Pro tip: Store leftovers in an airtight container in the fridge for up to three days. But they’re best served at room temperature. For more tips, check out the detailed instructions on serving tiramisu brownies for a smooth experience!
By following these tips, you’ll wow your guests with both taste and presentation. Share how your dessert presentation turned out, and happy baking!
Common Mistakes to Avoid
Baking Tiramisu Brownies can be a delightful experience if done right! However, even seasoned bakers can stumble upon a few common pitfalls. Let’s dive into some essential *tiramisu brownies troubleshooting* to ensure you’re *avoiding baking errors* and achieving perfect results with every batch.
Overmixing the Batter
One of the key *brownie recipe tips* is to avoid overmixing. Overmixing the batter can lead to tough, dense brownies instead of the rich, fudgy texture we all love. Mix until just combined to keep the batter light and airy.
Incorrect Layering
Correct layering is crucial for the perfect tiramisu brownie. When layering the brownie and tiramisu components, make sure each layer is even and smooth. Incorrect layering can cause uneven baking and affect the overall taste and texture. Remember, each layer should complement the other!
Timing Mishaps
Proper timing is another critical factor in tiramisu brownies troubleshooting. Baking for too long or too short can result in disappointing textures. Always follow the recipe’s recommended baking times closely, but also keep an eye on your brownies towards the end of the baking period. Use a toothpick to check for doneness; it should come out with only a few moist crumbs.
Armed with these *brownie recipe tips*, you’ll be well on your way to *avoiding baking errors* and crafting the most delectable Tiramisu Brownies possible. Happy baking!
Healthier Alternatives for Tiramisu Brownies
If you want to enjoy tiramisu brownies without the guilt, we’ve got you covered! We’ll look at some great substitute ingredients and low-fat brownie options. These will help you make a healthier tiramisu brownies recipe that’s still delicious.
Substitute Ingredients
- Swap refined flour with whole wheat flour for added fiber.
- Use Greek yogurt instead of butter for a rich texture with fewer calories.
- Replace regular sugar with natural sweeteners like stevia or coconut sugar for a low-sugar dessert option.
Low-Sugar and Low-Fat Options
“Who said you can’t have your brownies and eat them too? With these creative swaps, you can enjoy low-sugar desserts that are just as tasty!”
To make your tiramisu brownies a low-fat brownie alternative, consider these tips:
- Use mashed bananas or applesauce in place of some of the sugar and fat.
- Incorporate unsweetened cocoa powder for a rich, chocolatey flavor with less sugar.
- Opt for low-fat cream cheese or a plant-based alternative for the classic tiramisu layer.
By making a few simple tweaks, you can enjoy these healthier tiramisu brownies without feeling like you’re compromising on taste. So go ahead and indulge yourself—guilt-free!
Frequently Asked Questions About Tiramisu Brownies
Baking these treats brings joy, but also recipe queries and brownie baking questions. We’re here to answer them all! Let’s tackle the most common tiramisu brownies FAQs to make your baking smooth and fun!
- Can I make gluten-free tiramisu brownies? Absolutely! Use oat flour or a gluten-free flour blend. This Tiramisu Brownies recipe is versatile for different diets.
- Is it possible to omit the coffee? Yes, you can! Just adjust the wet ingredients to keep the texture right.
- What sweeteners can I use? Honey, maple syrup, or agave are great for the topping.
- How do I know when my brownies are done? Bake for 25-30 minutes until the center is set but still slightly fudgy.
- Can I make these vegan? Definitely! Use dairy-free yogurt, cream cheese, and chocolate for a vegan version.
Got more brownie baking questions? We’ve got you covered! We can help with storage (up to 5 days in the fridge or 3 months in the freezer), serving ideas (cocoa powder, coconut whipped cream, or dairy-free ice cream), and what equipment you need (digital food scale, loaf tin, parchment paper, mixing bowls, whisk, spatula, and sieve). We’re here to help you bake with confidence!
Conclusion
Our chocolate adventure has come to an end. Let’s enjoy the journey we’ve shared in making these delicious tiramisu brownies. We’ve covered every step, from picking the best chocolate to layering with care. Now, you know how to bake brownies well and are ready for more tasty tiramisu moments.
Baking is more than following recipes. It’s about enjoying the process and making something amazing. Whether you’re enjoying these treats alone or sharing them with others, you’ve made each bite special.
Now, keep exploring your baking skills with confidence! The world of chocolate and tiramisu is full of new things to try. Have fun, enjoy every moment, and happy baking!
Tiramisu Brownies Recipe
Decadent, Chocolatey, and Rich with Coffee Flavor. These tiramisu brownies are a match made in dessert heaven. A rich, fudgy brownie base meets a creamy mascarpone layer infused with coffee and a touch of liqueur—bringing the best of both worlds together. Perfect for gatherings or a cozy treat at home!
Serving Size: 12 piecesPrep Time: 15 minutesCook Time: 30 minutesTotal Time: 45 minutes
Ingredients (Per Serving)
- 1/2 cup granulated sugar
- 1/2 cup unsalted butter, melted
- 1/2 cup all-purpose flour
- 1/4 cup cocoa powder
- 1 tsp vanilla extract
- 1/4 tsp baking powder
- 1/4 tsp salt
- 1 large egg
- 1 cup mascarpone cheese
- 1/4 cup powdered sugar
- 1/4 cup strong brewed coffee, cooled
- 1 tbsp coffee liqueur (optional)
- Cocoa powder and chocolate shavings for garnish
Nutritional Facts (Per Serving)
- Calories: 200
- Protein: 3g
- Carbohydrates: 25g
- Fats: 9g
- Fiber: 1g
- Sodium: 100mg
- Sugar: 18g
Instructions
1. Prepare the Brownie Layer
- Preheat your oven to 350°F (175°C). Grease or line an 8×8-inch baking pan.
- In a mixing bowl, whisk together flour, cocoa powder, baking powder, and salt.
- In another bowl, mix melted butter and sugar until well combined. Beat in the egg and vanilla extract.
- Gradually fold the dry ingredients into the wet ingredients until just combined.
- Pour the batter into the prepared pan and spread evenly. Bake for 20–25 minutes or until a toothpick inserted in the center comes out with a few moist crumbs.
- Let the brownies cool completely before adding the tiramisu layer.
2. Make the Tiramisu Layer
- In a medium bowl, whisk together mascarpone cheese and powdered sugar until smooth.
- Mix in the cooled brewed coffee and coffee liqueur (if using) until fully incorporated.
- Spread the mascarpone mixture evenly over the cooled brownie base.
3. Chill and Garnish
- Refrigerate the assembled brownies for at least 2 hours to allow the tiramisu layer to set.
- Before serving, dust the top with cocoa powder and garnish with chocolate shavings.
4. Serve and Enjoy!
Slice into 12 pieces and enjoy chilled or at room temperature. Store any leftovers in the fridge for up to 5 days.
Pro Tips
- Use high-quality chocolate and coffee for richer flavor.
- Make sure the brownies are completely cool before layering the mascarpone.
- Let brownies come to room temperature before serving for best texture.


