How to Make Starbucks Cake Pop Recipe – Simple & Perfect!
Share this recipe
Imagine biting into a moist, sweet treat that reminds you of cozy coffee shop mornings. Maybe it’s with your favorite latte. That treat is the irresistible Starbucks cake pop. Ever wanted to make this delight at home? It’s perfect for parties, indulgences, or just for fun.
Making your own Starbucks cake pop recipe is surprisingly simple and satisfying. Let’s explore an easy cake pop tutorial together. It will bring joy to your kitchen and smiles to your loved ones.
In this guide, you’ll learn how to make these delicious homemade cake pops. You’ll discover how to create the perfect cake base and master dipping and decorating. This tutorial has everything you need. Dive in and make a beloved Starbucks treat at home.
Key Takeaways
- Creating Starbucks cake pops at home is easier than you think.
- Follow the step-by-step easy cake pop tutorial for perfect results.
- Personalize your homemade cake pops with different flavors and decorations.
- Understand the necessary tools and ingredients for the best tasting cake pops.
- Learn tips for storing and troubleshooting common cake pop problems.
Introduction to Starbucks Cake Pops
Cake pops have become a big hit in the dessert world, and Starbucks is at the forefront. These treats are a perfect size for a sweet snack, especially with your coffee. We’ll look at how Starbucks cake pops went from a new idea to a favorite dessert.
Brief History of Starbucks Cake Pops
Starbucks brought cake pops to the scene in 2011 as part of their Starbucks dessert recipes. They quickly became a hit because of their fun look and tasty flavor. They were a smart move to add more desserts to the menu, and fans loved them right away.
Popularity and Appeal
Starbucks cake pops stand out because they’re different from usual desserts. They offer a fun and easy way to enjoy cake. Their bright colors and fun designs attract kids and adults looking for a fun snack. Plus, their consistent texture and many flavors make them a favorite among dessert lovers. Making your own Starbucks cake pops at home lets you enjoy this treat anytime.
Ingredients for Starbucks Cake Pop Recipe
To make a tasty cake pop recipe like Starbucks, you need some key ingredients. You’ll also want some optional extras to make your treats special and tailored to your liking.
Essential Cake Pop Ingredients
Every great cake pop recipe starts with a few basic items. Here’s what you need to make your own Starbucks-style cake pops:
- Cake: Choose a moist cake flavor you love, like vanilla, chocolate, or red velvet.
- Frosting: Use buttercream or cream cheese frosting to hold your cake crumbs together.
- Candy Melts or Chocolate: Coat your cake pops with these to get that Starbucks look.
- Cake Pop Sticks: These are crucial for making the pop’s stick part.
Optional Add-ins and Variations
Want to make your cake pops stand out? Here are some fun add-ins and variations:
- Flavor Extracts: Add a bit of almond, peppermint, or coconut extract to your frosting.
- Sprinkles and Toppings: Top your cake pops with sprinkles, crushed nuts, or edible glitter.
- Coloring: Use food coloring to make your cake pops bright and colorful.
- Filling: Add fillings like jam or caramel for an extra burst of flavor.
With these ingredients and extras, you can make your cake pops unique for any event or taste.
Equipment and Tools You Will Need
Starting your easy Starbucks cake pop recipe means having the right tools. This makes the process smooth and helps you get perfect results.
Must-Have Cake Pop Tools
Before you start your Starbucks cake pop tutorial, make sure you have these tools:
- Mixing Bowls: Various sizes for mixing cake batter and frosting.
- Hand Mixer or Stand Mixer: To ensure your batter and frosting are perfectly smooth.
- Measuring Cups and Spoons: Accuracy is key for the best cake pop tips.
- Baking Pan: Ideal for baking the cake to perfection.
- Cooling Rack: To cool the cake properly before crumbling.
- Food Processor: Efficiently crumbles the cake for an even mixture.
- Cake Pop Sticks: Essential for shaping and holding your cake pops.
- Styrofoam Block or Cake Pop Stand: Holds the pops upright as the coating sets.
Useful Extras
These extra gadgets can make your Starbucks cake pop tutorial even better:
- Squeeze Bottles: Great for drizzling melted chocolate or candy melts onto pops.
- Melon Baller: Ensures consistent cake ball sizes.
- Double Boiler: Helpful for melting chocolate or candy melts.
- Disposable Gloves: Keeps your hands clean while shaping and dipping the cake balls.
- Sprinkles and Decorations: To add that extra flair to your cake pops.
With these tools, you’re ready to master an easy Starbucks cake pop recipe. Remember, good preparation leads to amazing results at home.
Preparing the Cake for Cake Pops
Before you start making cake pops, you need to prepare the perfect cake base. This means choosing the right cake and following baking tips for the best texture. Let’s look at some important tips to help you improve your baking with this easy cake pop tutorial.
Best Cake Types to Use
Choosing the right cake is key for a great Starbucks cake pop recipe. Vanilla or chocolate cakes are usually recommended. They are moist and sturdy, perfect for cake pops.
- Vanilla Cake: A classic choice, vanilla cake offers a light flavor profile that complements various frosting flavors.
- Chocolate Cake: Perfect for chocolate lovers, this cake provides a rich, decadent taste.
Using a pound cake can also help. Its dense structure makes it easier to shape and less likely to crumble.
Baking Tips for Perfect Cake Texture
To bake the perfect cake for cake pops, pay close attention to detail. Here are some tips for the right texture:
- Follow the Recipe Precisely: Accurate measurements of Starbucks cake pop ingredients are crucial for consistency.
- Don’t Overmix: Overmixing can make the cake dry. Mix just until the ingredients are combined.
- Check for Doneness: Use a toothpick to test the cake. When the cake is fully baked, a tester should come out clean or with a few soft crumbs attached.
- Cool Completely: Let the cake cool completely before crumbling. This ensures it has set properly and will hold together well when mixed with frosting.
By following these baking tips, you’ll be well on your way to making successful cake pops. Whether you’re trying the best Starbucks cake pop recipe or another version, these details are crucial. Paying attention to them will ensure your cake pops turn out perfectly every time.
Making the Frosting
Creating the perfect frosting is key to achieving the Starbucks inspired cake pop recipe you desire. The right frosting adds flavor and binds the cake crumbs together for the perfect texture.
Ingredients for the Frosting
To make a delicious cake pop recipe, you’ll need the following ingredients for the frosting:
- 1 cup of unsalted butter, softened
- 3 cups of powdered sugar
- 2 teaspoons of vanilla extract
- 2 tablespoons of heavy cream
- Pinch of salt
Steps to Prepare Homemade Frosting
Follow these steps to create the perfect frosting for your homemade cake pops. These instructions will ensure a smooth and velvety texture that complements your cake admirably.
- Cream the Butter: In a large bowl, beat the softened butter until it is creamy and smooth, about 2-3 minutes.
- Add the Sugar Gradually: Slowly add the powdered sugar, one cup at a time, beating continuously to ensure a lump-free texture.
- Incorporate the Vanilla: Mix in the vanilla extract. This step enhances the flavor, giving you that authentic Starbucks inspired cake pop recipe essence.
- Adjust Consistency: Add heavy cream, one tablespoon at a time, to reach the desired consistency. If the frosting is too thick, you can add more cream.
- Balance the Flavors: Finally, add a pinch of salt to the frosting to balance the sweetness, and beat until well combined.
By following these instructions, you’ll create a scrumptious frosting that profoundly complements your delicious cake pop recipe, taking your homemade cake pops to the next level.
Crumbling and Mixing the Cake
Once your cake is fully cooled, it’s time to turn it into fine crumbs and mix it with frosting. This is the base for your Starbucks-inspired cake pops. Getting this right is key for anyone trying to make cake pops at home.
Process for Crumbling the Cake
Begin by breaking the cake into small pieces with your hands or a fork. Remove any hard edges or browned parts as they can ruin the texture. Put the cake pieces in a big mixing bowl and crumble them with your hands until they’re like fine sand.
Mixing Cake Crumbs with Frosting
Now, mix the crumbled cake with frosting until it’s dough-like. For an easy Starbucks cake pop recipe, start with a little frosting in the bowl of crumbs. Mix it in slowly until it’s just right, not too sticky. You’ll likely need about 1/3 to 1/2 cup of frosting for a standard cake.
Getting the cake and frosting mix just right is essential. It makes sure your cake pops stick together well. This step is vital for making those tasty Starbucks dessert recipes we all enjoy.
Shaping and Freezing the Cake Balls
Making perfect cake balls is crucial for the Starbucks cake pop copycat recipe. Follow these tips to get your homemade cake pops looking great.
Forming Consistent Cake Balls
Consistency is key when shaping cake balls. Use a cookie scoop to portion out the cake mixture evenly. This makes uniform balls, ensuring they look the same.
Roll the mixture between your palms gently to create smooth, round balls. It’s important to keep even pressure to avoid cracks or unevenness. Aim for balls about 1.25 inches in diameter for easy dipping.
Tips for Freezing Cake Balls
Freezing the cake balls is a key step in the best Starbucks cake pop recipe. It keeps their shape and makes them easier to handle. Place the balls on a baking sheet lined with parchment paper.
- Arrange the cake balls in a single layer, ensuring they do not touch each other.
- Freeze them for at least 15 minutes, though you can freeze them longer if needed.
- Make sure the balls are firm but not fully frozen, making them less likely to crack or fall apart when you insert the sticks or dip them in coating.
These freezing tips are key for a perfect Starbucks cake pop copycat recipe. Once frozen, you’re ready for the next step in making your tasty homemade cake pops.
Preparing the Coating
The coating makes your cake pops look amazing. It can be for a Starbucks inspired recipe or any other. The coating should be smooth and shiny.
Options for Coating
Choosing the right coating is key for your cake pops. Here are some common choices:
- Chocolate: Pick semi-sweet, milk, or white chocolate based on your taste.
- Candy Melts: They come in many colors and are easy to use.
- Frosting Dips: For a softer coat, thin down your favorite frosting with milk.
Melting and Tempering Chocolate
Learning to melt and temper chocolate is important for making Starbucks cake pops well. Here’s how to do it:
- Chop your chocolate into small pieces for even melting.
- Melt the chocolate in a double boiler or microwave. If using the microwave, heat in 15-second bursts, stirring often.
- Cool the chocolate a bit while stirring to get it to the right tempering temperature.
These steps will help your cake pops have that perfect shiny look.
Dipping the Cake Pops
Learning to dip cake pops is key in this easy tutorial. A smooth coat makes them look like they’re from Starbucks. Here’s how to get a perfect finish and avoid common mistakes.
Steps for Perfect Dipping
- Prepare Your Dipping Station: Get wax paper and your tools ready. Make sure your melted coating is in a deep bowl for easy dipping.
- Coat the Sticks: Dip each stick into the melted coating about half an inch before putting it in a cake ball. This secures the stick in the cake pop.
- Dip at an Angle: Submerge the cake pop in the coating at an angle. Twirl gently to get an even coat without bubbles.
- Finish with Confidence: Hold the cake pop above the bowl and gently tap off excess coating. Rotate the stick for a smooth surface.
Common Mistakes to Avoid
- Overheating the Coating: Melt your coating in short intervals to avoid scorching. Overheated coatings are too thick and hard to work with.
- Skipping the Stick Coating: Forgetting to dip the stick in coating before inserting can cause cake pops to fall off.
- Dipping Too Fast: Dipping too quickly can create air bubbles and an uneven coat. Take your time for a smooth finish.
- Incorrect Storage: Place dipped cake pops upright in a styrofoam block to set. Avoid laying them flat to prevent damage to the coating.
By following these steps and avoiding common mistakes, you can improve your cake pop skills. Whether you’re making cake pops at home or following a Starbucks tutorial, mastering dipping is crucial for professional results.
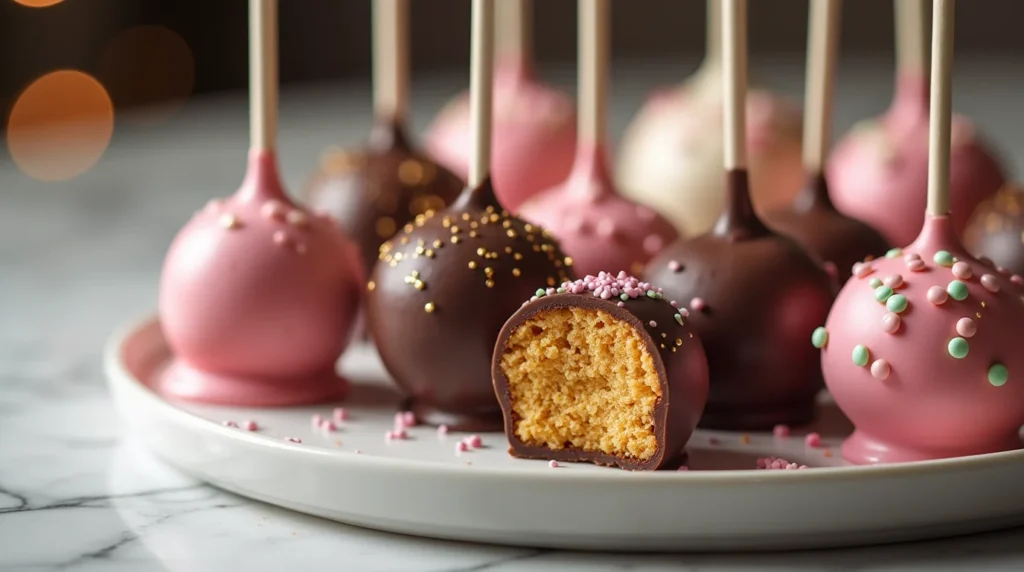
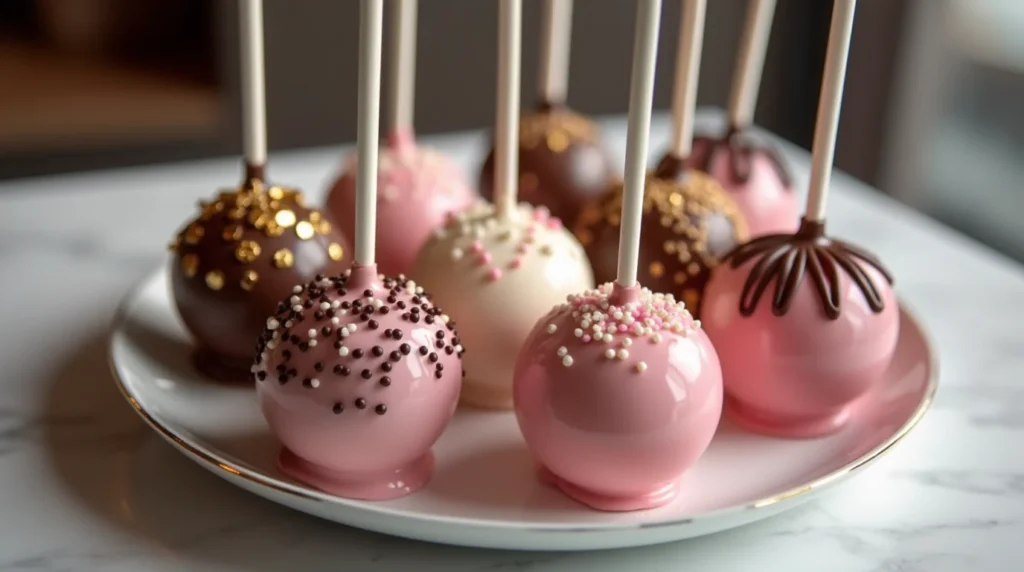
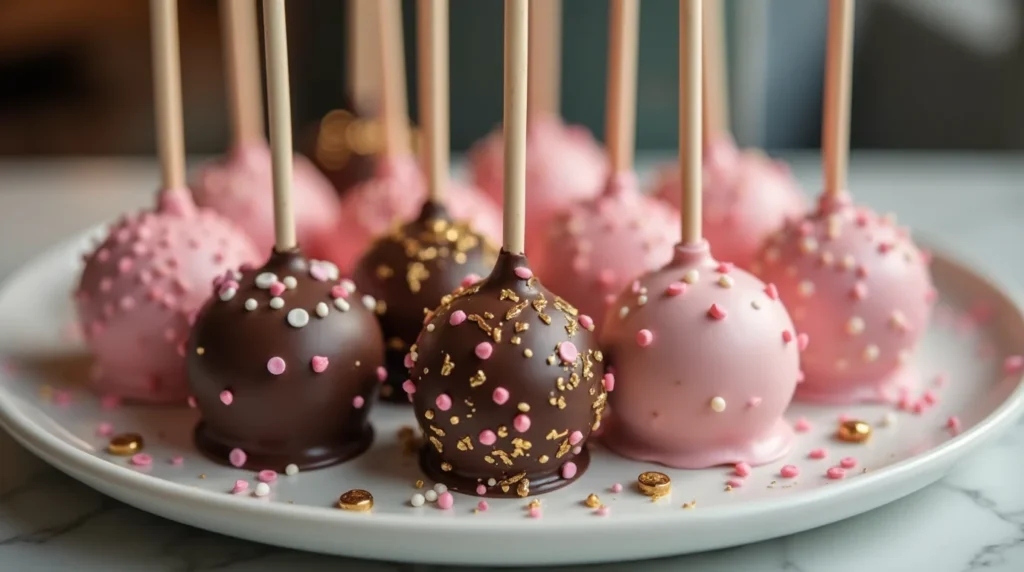
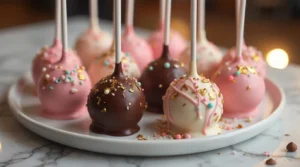
Decorating Your Cake Pops
After dipping your cake pops, it’s time to show off your creativity. You can make them look like Starbucks’ or create something unique. We’ll share easy and advanced ways to decorate your cake pops, making them both stunning and tasty.
Simple Decoration Ideas
Begin with simple ideas to learn the basics.
- Sprinkles: Sprinkles add color and texture. Just dip the cake pops and coat them with sprinkles while wet.
- Drizzles: Use melted chocolate of a different color to drizzle lines. It’s a best cake pop tip for a pro look.
- Colored Sugar: Roll the cake pops in colored sugar for a sparkly look.
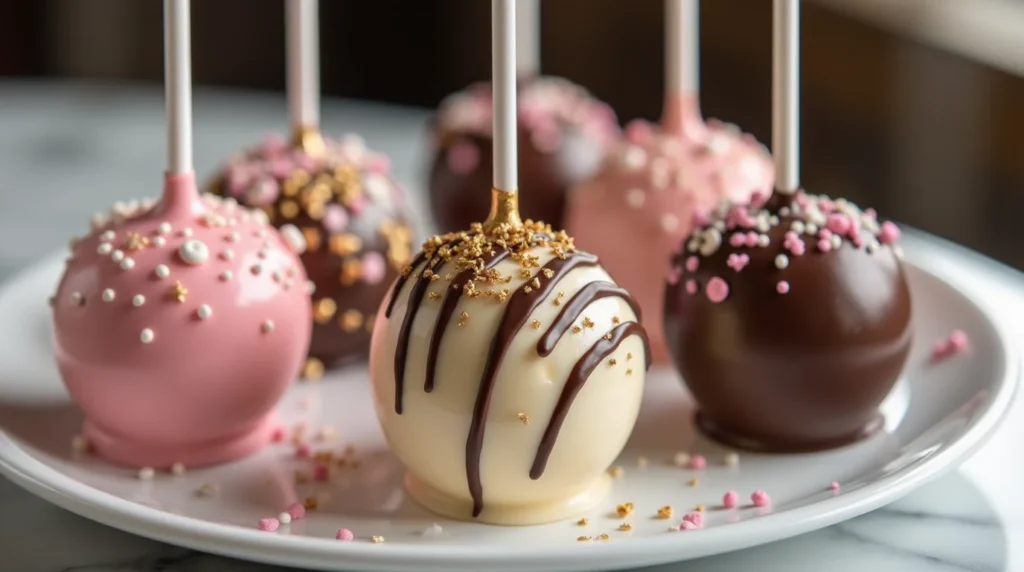
Advanced Decoration Techniques
For a more advanced look, try these techniques:
- Themed Toppers: Use small edible toppers like stars or hearts. Attach them while the coating is wet.
- Detailed Designs: Draw designs with edible markers or food-safe paint. It can make your cake pops stand out.
- Layered Coatings: Dip in two colors for a layered look. It’s pretty and offers a new flavor mix.
How to Make Starbucks Cake Pops at Home
Learning to make Starbucks cake pops at home is easier than you might think. Just follow this Starbucks cake pop recipe to make this favorite treat in your kitchen.
Step-by-Step Guide
Are you ready to make cake pops? Here’s an easy Starbucks cake pop recipe for you:
- Prepare the Cake: Bake a vanilla cake mix as the box says. Let it cool down completely.
- Crumble the Cake: In a big bowl, crumble the cooled cake into small pieces.
- Mix with Frosting: Add powdered sugar and a bit of vanilla extract to the crumbs. Mix until it sticks together.
- Form Cake Balls: Make the mixture into 1-inch balls and put them on a baking sheet.
- Freeze: Put the cake balls in the freezer for about 15 minutes until they’re firm.
- Prepare the Coating: Melt pink candy melts in a microwave-safe bowl.
- Dip the Cake Pops: Stick a stick into each ball and dip it into the melted candy, covering it well.
- Set and Decorate: Let the candy set, then decorate as you like.
Pro Tips for Homemade Cake Pops
- Consistency Matters: Make sure the cake and frosting mix isn’t too dry or too wet. It should stick together well.
- Even Coating: For a smooth coat, gently tap the stick to let excess candy melt drip off.
- Storage: Keep your cake pops in an airtight container at room temperature or refrigerate for longer.
Making your own Starbucks cake pop copycat recipe saves money and lets you enjoy these treats whenever you want. For more detailed steps, check out this guide.
Cake Pop Storage Tips
Storing your cake pops right can keep them fresh and tasty. Follow these tips to enjoy your homemade cake pops at their best.
How to Store Cake Pops for Freshness
After making your delicious cake pop recipe, it’s important to store them well. Keep them in an airtight container at room temperature for up to two days. For longer storage, refrigerate them, making sure they’re sealed to avoid moisture loss and odors.
Can You Freeze Cake Pops?
Yes, freezing cake pops can extend their life. Wrap each pop in plastic wrap or foil after the coating sets. Then, put them in a freezer-safe container or bag. To thaw, keep them in the fridge for a few hours before warming them up.
Knowing how to store cake pops is part of making them at home. These tips will help your cake pops stay fresh and enjoyable for longer.
Common Cake Pop Problems and Solutions
Even with the best cake pop tips, you might still face issues like cracks and sogginess. But don’t worry, these problems can be fixed. Learning how to solve them will help you make delicious cake pops every time.
Dealing with Cracks
Cracks in cake pops usually happen because of temperature differences. To avoid this, make sure your cake balls are at room temperature before coating. If you already have cracks, you can fix them by gently pressing the coating while it’s still soft.
Fixing Soggy Cake Pops
Soggy cake pops often come from too much frosting. Start with a small amount of frosting and add more as needed. Using the right Starbucks cake pop ingredients is key. If your cake pops are still soggy, try chilling the mixture before shaping to firm it up.
Starbucks Cake Pop Copycat Recipe Variations
Making a Starbucks copycat recipe can be a fun adventure. You can try different flavors and designs. You can even make seasonal and themed treats. The possibilities are endless.
Different Flavors and Designs
Want to make a Starbucks cake pop at home? Try out various flavors and designs. You can use chocolate, vanilla, red velvet, or even matcha. Add sprinkles, chocolate drizzles, or fondant shapes to make them look great. Here are some ideas to get you started:
- Chocolate-Dipped Coffee Cake Pops
- Strawberry Shortcake Pops
- Matcha Green Tea Pops with White Chocolate
- Lemon Poppy Seed Cake Pops
Seasonal and Themed Variations
Make themed cake pops for holidays or special events. It adds fun to the celebration. Here are some Starbucks inspired cake pop recipe ideas for different times:
- Halloween: Pumpkin Spice Cake Pops with spooky decorations.
- Christmas: Peppermint Mocha Cake Pops with festive colors.
- Easter: Carrot Cake Pops shaped like bunnies or eggs.
- Valentine’s Day: Red Velvet Cake Pops with heart-shaped designs.
These variations let you enjoy your favorite treats with a personal twist. It’s a great way to add your own special touch.
Frequently Asked Questions About Cake Pops
Exploring the world of cake pops can raise some questions. We’ve got answers to common ones about the Starbucks cake pop tutorial. This will make your experience smooth and enjoyable.
Can I Use Boxed Cake Mix?
Yes, you can definitely use boxed cake mix for cake pops! Some like baking from scratch, but boxed mix is easy and works well. Just bake the cake as directed, then follow the steps on how to make Starbucks cake pops.
How Long Do Cake Pops Last?
The life of cake pops depends on storage. To keep them fresh and tasty, follow these tips:
- Room Temperature: Store cake pops in an airtight container for 1-2 days at room temperature.
- Refrigerated: They stay good for a week in the fridge, keeping their texture and taste.
- Frozen: Freeze them for up to 3 months. Wrap each pop in plastic wrap, then bag them in a freezer-safe bag.
With these storage tips, your homemade cake pops will always be fresh and delicious!
Conclusion
Making your own Starbucks cake pops at home is fun and rewarding. It lets you enjoy this treat whenever you like. Our guide shows you how to make cake pops easily, just like Starbucks.
Anyone can mix baked cake, creamy frosting, and a perfect coating. Following our steps, you’ll find making cake pops fun. It lets you get creative with decorations and flavors. With a little patience and practice, you’ll become a cake pop master.
Invite your friends and family to make cake pops with you. Share your creations on social media too. For more dessert ideas, check out Top Creative Recipes. Your kitchen will become a place of sweet memories and happy taste buds. Enjoy every bite of your homemade Starbucks cake pops.
Starbucks Cake Pop Recipe
Short Description
Bring the charm of your favorite coffee shop home with this easy Starbucks cake pop recipe! These sweet, moist cake bites are coated in colorful candy melts and perfect for parties, gifts, or anytime indulgence. Simple, fun, and customizable—just like the originals.
Serving Info
- Serving Size: 1 cake pop
- Prep Time: 45 minutes
- Cook Time: 30 minutes
- Total Time: 1 hour 15 minutes
Ingredients (Per Serving)
(Note: Recipe makes ~24 cake pops. Multiply as needed.)
- 1/12 of a baked vanilla cake (approx. 1/2 cup crumbs)
- 1 tbsp buttercream frosting
- 1.5 oz pink candy melts or white chocolate
- 1 cake pop stick
- Optional: Sprinkles, food coloring, extract flavorings
Nutritional Facts (Per Cake Pop – Estimated)
- Calories: 160
- Protein: 1.5g
- Carbohydrates: 20g
- Sugars: 14g
- Fats: 8g
- Saturated Fat: 4.5g
- Fiber: 0.3g
- Sodium: 75mg
Instructions
Bake the Cake
Prepare a boxed vanilla cake mix or homemade cake of your choice. Let it cool completely.Crumble the Cake
Break cooled cake into fine crumbs using your hands or a food processor. Remove any crusty edges.Mix with Frosting
Add buttercream frosting 1 tablespoon at a time. Mix until it forms a dough-like texture that holds together.Shape the Cake Balls
Scoop out portions and roll into 1 to 1.25-inch balls. Place on a parchment-lined tray.Freeze
Freeze the balls for 15–20 minutes until firm, but not frozen solid.Melt the Candy Coating
In a microwave-safe bowl, melt candy melts in 15-second intervals, stirring in between until smooth.Insert Sticks
Dip a cake pop stick into the melted coating, then insert it halfway into a cake ball. Repeat with all.Dip the Cake Pops
Submerge each pop into the melted coating. Gently tap off excess and rotate for a smooth finish.Decorate
While the coating is still wet, add sprinkles or drizzle with contrasting candy melts.Set and Serve
Stick pops upright in a styrofoam block or cake pop stand. Let them set at room temperature or chill to harden.
Pro Tips:
- Use dense cake like pound or sponge for the best texture.
- Avoid overmixing the frosting to prevent sogginess.
- For smooth coating, keep candy melts at the right temperature (not too hot!).
- Store at room temperature for 2 days, refrigerate for up to 2 weeks, or freeze for up to 3 months.


