How to Make Honey Pistachio Baklava – Buttery, Crispy & Absolutely Irresistible!
Share this recipe
Imagine the sweet smell of honey and toasted nuts in your kitchen. The sound of phyllo pastry breaking is music to your ears. And the taste of homemade baklava is pure bliss.
We love sharing these moments with our loved ones. It’s about making memories together. If you’ve ever had honey pistachio baklava, you know what we’re talking about. Now, it’s your turn to make it at home with our easy guide!
Key Takeaways
- Our homemade baklava recipe is simple and accessible for all skill levels.
- You’ll learn step-by-step how to create buttery, crispy layers of phyllo dough.
- Discover the secret to making a perfect honey syrup for drizzling.
- Understand how to properly cut and bake your baklava for best results.
- Learn storage tips to keep your baklava fresh.
- Gain confidence to experiment with flavors and textures.
Introduction to Honey Pistachio Baklava
Welcome to the world of honey pistachio baklava! If you’ve ever tried this Greek dessert, you know it’s amazing. It’s a mix of flavors and textures that’s hard to resist. Let’s explore this tasty pastry and its history, showing how it’s a treasure of Mediterranean sweets.
What is Baklava?
Baklava is a sweet pastry with many layers of phyllo dough. Each layer is brushed with butter and filled with chopped nuts. After baking until golden, it’s covered in a sweet honey syrup. This makes it a true delight, following the traditional baklava recipe.
The Origins of Baklava
The history of baklava goes back to ancient times. It’s believed to come from the Ottoman Empire’s cooking traditions. Over the years, it has stayed true to its roots, loved by many for its simple yet rich ingredients like phyllo, nuts, and honey.
Why You Will Love This Recipe
There are many reasons to love our honey pistachio baklava recipe! Here are a few:
- It keeps the traditional baklava recipe alive.
- The crispy phyllo and crunchy pistachios offer a great texture.
- The sweet honey syrup adds a fragrant flavor, making it a true Mediterranean sweet.
- It’s a classic Greek dessert that adds elegance to any event.
So, are you ready to learn how to make this delicious treat? Let’s get started!
Ingredients Needed for Honey Pistachio Baklava
To make a tasty phyllo pastry dessert like baklava, you need a few key ingredients. Let’s explore what’s needed for the perfect baklava with honey and nutty pastry.
Phyllo Dough
First, you’ll need phyllo dough. This thin dough adds crispy layers to your baklava. Keep it covered with a damp towel to prevent drying.
Honey
Next, we need honey for sweetness. High-quality honey is essential for drizzling over the layers. It gives them a sticky, rich flavor.
Pistachios
Pistachios are the main attraction in our nutty pastry. Chop them finely so they spread evenly between the phyllo layers. Their green color and unique taste are perfect for baklava.
Butter
Melted butter is key for adding richness to each layer. It makes the baklava golden-brown and adds a savory touch that balances the honey’s sweetness.
Additional Ingredients
Lastly, here are a few more ingredients you’ll need:
- Granulated Sugar: Adds sweetness and texture to the nut mixture.
- Cinnamon: Adds a warm, spicy flavor that complements the pistachios.
- Lemon Juice: A splash of lemon juice in the honey syrup brightens the flavor and adds a tang.
With these ingredients, we’re ready to make a delicious phyllo pastry dessert that will impress everyone!
Tools You Will Need For Perfect Honey pistachio Baklava Recipe
To make the perfect honey pistachio baklava, you need the right baklava kitchen tools. Having reliable baking essentials makes pastry preparation easier and more fun!
Baking Pan
A good baking pan is key for baklava. Choose a sturdy, non-stick pan for even heating. Aluminum and glass pans are top picks for bakers.
Brush
A pastry brush is a must-have. It’s used to spread butter between phyllo dough layers. For the best results, pick a silicone or natural bristle brush.
Knife
Cutting baklava needs a sharp knife. A long, thin knife is best for clean cuts. A sharp knife makes the job easier and cleaner.
With these baking essentials, you’re ready to start making baklava. Let’s enjoy the process and create something tasty together!
Preparing Your Workstation
Creating a calm and well-organized cooking setup is key for efficient baking. This is especially true when making a complex dessert like baklava! Let’s explore our top tips for kitchen organization before we start.
- Clear Your Countertops: Remove any unnecessary items and give your workspace a good wipe down. This will help you focus and keep everything clean.
- Gather Your Tools: Arrange all the tools you need, including the baking pan, brush, and knife. Having everything within reach will make the process smoother.
- Pre-measure Ingredients: Measure out your pistachios, honey, butter, and additional ingredients beforehand. This simple step ensures that you won’t scramble for items mid-recipe.
- Set Up a Clean Zone: Allocate a specific area for handling phyllo dough, ensuring that it remains hygienic and free from contamination.
- Organize a Trash Station: Keep a bowl or bag handy for quick disposal of food scraps and packages. This keeps your area tidy and speeds up the cleanup process.
By focusing on your kitchen organization and creating a thoughtful cooking setup, you’ll set yourself up for successful and efficient baking.
Creating the Nut Filling
It’s time to make our honey pistachio baklava special – the nut filling! We aim to mix a balanced and fragrant blend. This will match the sweet and buttery phyllo dough layers.
Chopping the Pistachios
Begin with top-notch pistachios for the best taste. Use a sharp knife to chop them into small, even bits. This step is key for a uniform texture in our nut filling.
Mixing with Sugar and Spices
With our chopped pistachios ready, it’s time to add sweetness and spice! Mix the pistachios with sugar and your favorite spices. Try cinnamon, ground cloves, and a bit of cardamom for a great flavor.
Layering the Phyllo Dough
Making perfect baklava starts with the phyllo dough layers. This step can be tricky, but we’ve got the pastry layering techniques to help. Your baklava will be crispy and tasty!
Preparing the Phyllo Sheets
Phyllo dough is very thin and dries out fast. So, handle it gently. Begin by unrolling the dough and covering it with a damp towel. This keeps it moist.
Work with one sheet at a time. Place each sheet carefully in the baking pan.
Butter the Layers
To get that buttery flavor, butter each phyllo dough layer. Use a pastry brush to spread melted butter over the sheet. This makes the dough flaky and boosts the baklava’s texture.
Keep adding layers and buttering until you have enough for the nut filling. The more layers, the flakier and tastier your baklava will be!
Constructing the Baklava Layers
We’re almost done making our delicious baklava! This part is all about the baklava construction. We’ll layer phyllo and nuts to make those crispy pastry layers we all love.
Alternating Layers of Phyllo and Nuts
Begin by placing a sheet of phyllo dough in your baking pan. Make sure it covers the bottom. Then, brush it with melted butter, paying extra attention to the edges.
Next, sprinkle a lot of our nut mixture over the phyllo. This will be the first layer.
Keep adding layers until you’ve used all the nut mixture. Save some phyllo sheets for the top.
The Final Layer
The last layer is crucial for the baklava construction. Place a thick stack of phyllo sheets on top. Make sure to brush each sheet with butter for a golden, crispy look.
This step will make your baklava extra special. You’re almost ready to bake!
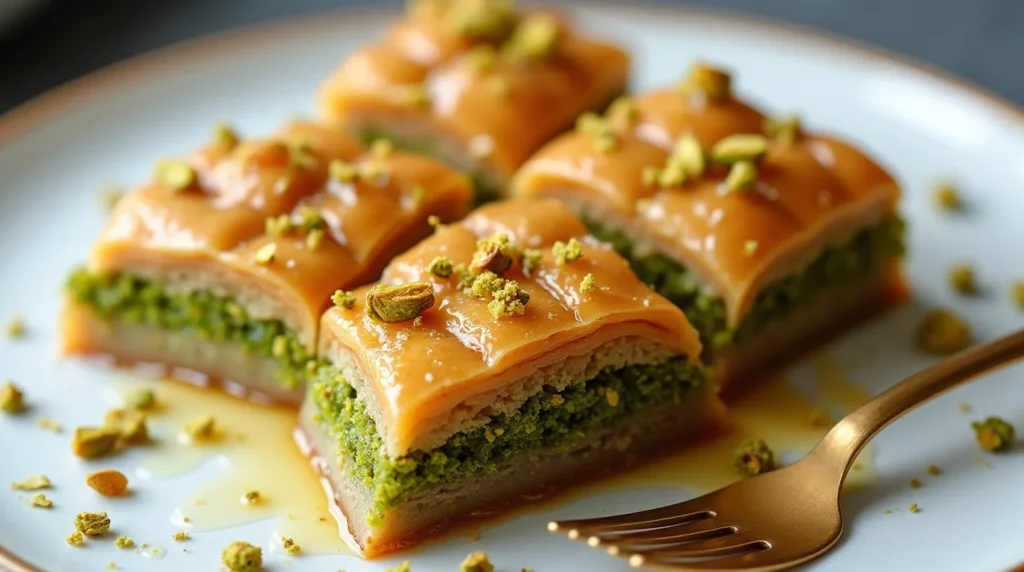
Cutting the Baklava Before Baking
Before we pop our baklava into the oven, it’s crucial to cut it into the traditional diamond shapes! This step ensures not only a beautiful presentation but also that each piece bakes evenly.
Traditional Diamond Shapes
Let’s get started with cutting baklava into the classic diamond-shaped pastry. First, place the assembled baklava on a stable surface. With a sharp knife, cut diagonal lines approximately 1 to 1.5 inches apart starting from one corner of the tray and moving to the opposite corner. This gives us those distinct diamond shapes we all love!
Making Even Cuts
Ensuring that each piece is even is a significant part of our pre-baking techniques. After cutting the first set of diagonal lines, turn your tray 90 degrees and repeat. Cutting baklava this way not only makes it look gorgeous but also makes serving easy. Be sure to use a ruler if needed to keep those lines perfectly straight and uniform!
And there we have it—our baklava is perfectly sliced and ready to bake, making each piece a delectable, diamond-shaped pastry. Let’s get ready to bake them to golden perfection!
Baking the Baklava
It’s time to make that delicious baklava! First, we need to preheat the oven. We also need to know the right baking time for a crispy phyllo dessert.
Preheating the Oven
Preheating the oven is key for baking baklava right. Set your oven to 350°F. Let it heat up fully before putting the baklava inside. This ensures even heat, which is crucial for crispiness.
Recommended Baking Time
- Place the baklava in the center of the oven.
- Bake for about 45-50 minutes until the top is golden brown.
- Keep an eye on it during the last 10 minutes to prevent over-baking.
For a perfect crispy phyllo dessert, follow these tips: rotate the baking pan halfway through. This ensures even baking. Also, avoid placing the baklava too close to the heating elements.
Making the Honey Syrup
Let’s add that sweet touch to our baklava with a honey syrup recipe! This step is key, making the dessert extra special. It soaks into the layers, giving it a lush texture!
Ingredients for the Syrup
To start making the syrup, you’ll need:
- 1 cup of granulated sugar
- 1 cup of water
- 1 cup of honey
- 1 tsp of lemon juice
- 1 tsp of cinnamon
Boiling the Syrup
In a medium saucepan, mix sugar, water, and honey. Heat it over medium, stirring until sugar dissolves. Then, boil it, then lower the heat.
Add lemon juice and cinnamon. Simmer for 10 minutes, stirring now and then. This lets the flavors mix well.
Cooling the Syrup
After simmering, turn off the heat. Let it cool at room temperature. This makes it thicken a bit, so it soaks evenly into the baklava.
Stir it occasionally as it cools. This keeps it smooth, ready for the final baklava step.
Looking for more recipes? Try this hot honey chicken for a sweet and spicy treat!
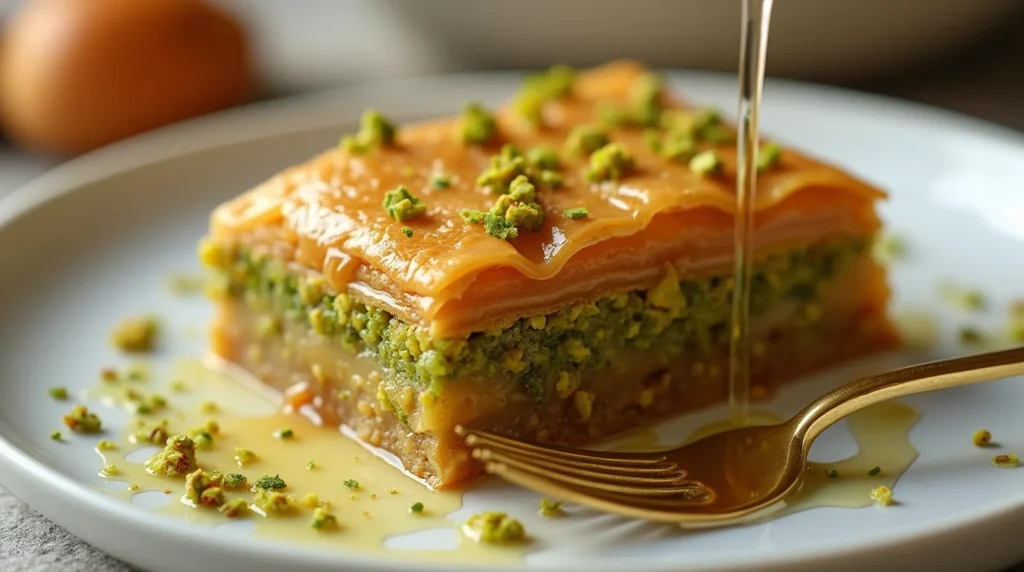
Pouring the Syrup Over the Baked Baklava
The moment of truth! After baking, your baklava needs that final touch: the syrup. Using the proper syrup drizzle technique, you ensure each piece gets the perfect baklava glaze while adding sweetness to every bite. Here’s how to achieve it:
- Allow the freshly baked baklava to cool for about 5 minutes.
- Prepare your syrup: it should be warm but not boiling.
- Using a ladle, gently pour the syrup over the baklava, ensuring you cover all areas evenly. This step is crucial for achieving the perfect baklava glaze.
- Utilize the syrup drizzle technique by moving in a circular motion, starting from the edges and working your way toward the center.
- Let the syrup soak for a minimum of 4 hours, but overnight is best to fully incorporate the flavors and moisture.
This step guarantees that your baklava is rich, moist, and irresistibly sweet. By adding sweetness in this manner, you’ll elevate your baklava to a delightful new level.
Letting the Baklava Soak
Letting your baklava soak is key to getting that perfect texture and flavor. Soaking makes sure every layer is full of goodness. It makes each bite a heavenly experience. Trust us, the wait is worth it!
Why Soaking Is Important
The baklava soaking process is very important. It lets the honey syrup soak into the phyllo dough and nut filling. This creates a mix of crisp and gooey textures. Without soaking, the baklava would be dry and less tasty.
How Long to Soak
For the best flavor, soak the baklava long enough but not too long. Usually, soaking it overnight—6 to 8 hours—is perfect. Some people soak it for 24 hours for an even richer taste. Being patient is key to making perfect baklava!
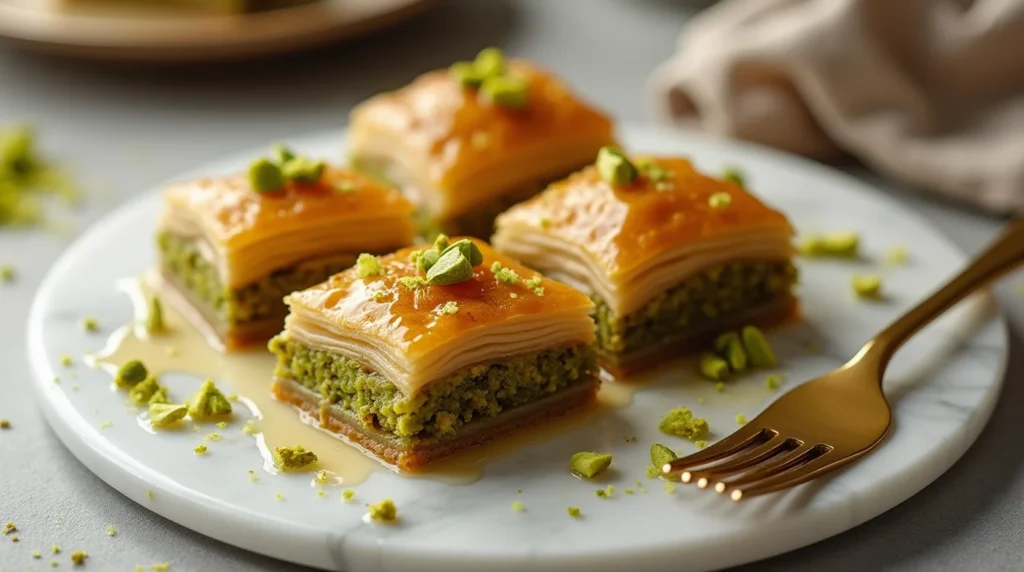
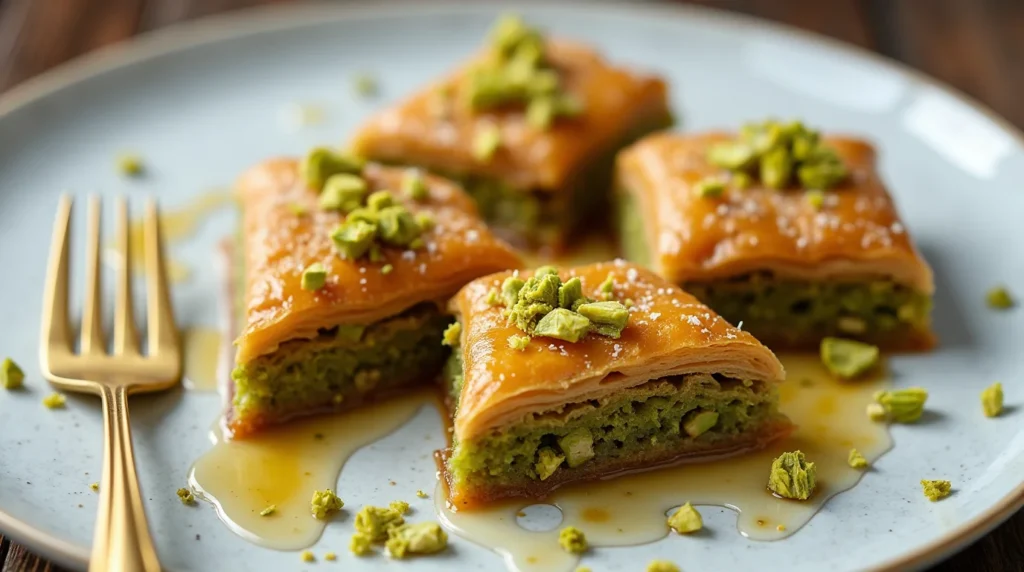
Serving Suggestions
Our baklava is fresh and ready to impress. How we serve it can make a big difference. We want to make this dessert a stunning centerpiece that will wow everyone. Let’s explore some tips on plating baklava and fun ideas for garnishes.
How to Plate Baklava
Highlighting baklava’s buttery, crispy layers is crucial. Here are some ideas:
- Single Serve Plates: Place one or two pieces on a small plate, leaving room for garnishes.
- Tiered Platters: Stack pieces on a tiered platter to show off their layers.
- Family Style: Arrange slices on a large dish for guests to serve themselves.
Garnishes and Add-Ons
Enhance your baklava with various garnishes:
- Chopped Pistachios: Sprinkle chopped pistachios for color and crunch.
- Drizzle of Honey: A light honey drizzle adds shine and sweetness.
- Whipped Cream: Serve with a dollop of vanilla-flavored whipped cream.
- Fresh Fruit: Add fresh figs or berries for color and freshness.
With these ideas, your baklava will be as beautiful as it is delicious. Let’s get creative and make it a show-stopper.
Storing and Preserving Your Homemade Baklava
Keeping your homemade baklava fresh is just as important as making it. The right storage methods can make your pastries stay delicious for days or even months!
Room Temperature Storage
For short-term storage, room temperature is great. Put the baklava in an airtight container. Store it in a cool, dry spot to keep the layers crisp.
Refrigeration Tips
Refrigeration is good for longer storage. Wrap each piece in plastic wrap and put them in a container. This keeps them fresh for up to two weeks.
Freezing Baklava
Freezing is best for long-term storage. Wrap each piece in plastic wrap and then in a freezer-safe bag. Thaw at room temperature when you’re ready. The flavors and textures will still be great!
Proper storage is key to keeping your baklava fresh. Whether you store it at room temperature, refrigerate, or freeze, your baklava will stay delicious.
Want more tips on using your food creatively? Check out our guide on creative uses for leftover foods!
Frequently Asked Questions About Honey Pistachio Baklava
Welcome to our baklava FAQs section! We’ve gathered answers to some of the most common baking questions. This will help you make the perfect honey pistachio baklava every time. Let’s dive in!
Can I Use Other Nuts?
Absolutely! Making baklava is all about flexibility. If pistachios aren’t your favorite, or you want to try something new, there are many alternative nut options. Almonds, walnuts, and pecans are all great choices. Just chop them finely for the best texture.
How Long Does It Last?
Homemade baklava can last up to two weeks if stored right. Keep it in an airtight container at room temperature, away from sunlight. If you prefer it chilled, refrigerate it for the same time. Always cover it to keep it crispy.
Can I Make It Ahead of Time?
Yes, baklava is perfect for making ahead! You can prepare and bake it up to a few days in advance. Let it cool completely before covering it tightly with plastic wrap. Add the syrup a day before serving to keep it crispy and well-soaked.
Got more baking questions? We’re here to help! By answering these common baklava FAQs, we’re sure you’ll be able to make this delightful dessert your own. Happy baking!
Conclusion
We’ve shown you how to make your kitchen a mini Greek bakery with our honey pistachio baklava recipe. We went through every step, from layering the phyllo dough to making the honey syrup. This journey was a delightful experience that makes Greek cuisine accessible to everyone.
When you see your baklava, golden and crispy, you’ll know you’ve followed a tradition loved by many. Enjoying this treat alone or with others will surely impress. The beauty of baklava is not just in its layers but in the love and creativity you put into it.
This guide should have sparked your creativity in the kitchen and added a new favorite to your list. Share your baklava with friends and family; they’ll love to try it! Enjoy every bite and let the flavors of Greek cuisine bring you joy.

Honey Pistachio Baklava Recipe
Indulge in the perfect balance of crisp, buttery phyllo layers, rich pistachios, and a luscious honey syrup. This Honey Pistachio Baklava is a classic Mediterranean treat that’s surprisingly easy to make—and unforgettable in flavor.
Recipe Info
- Serving Size: 24 pieces
- Prep Time: 45 minutes
- Cook Time: 45 minutes
- Total Time: 1 hour 30 minutes
Ingredients (Per 1 Serving)
- Phyllo dough – 16 oz package
- Chopped pistachios – 2 cups
- Unsalted butter (melted) – 1 cup
- Honey – 1 cup
- Granulated sugar – 1/2 cup
- Ground cinnamon – 1 tsp
- Water – 1 cup
- Lemon juice – 2 tbsp
- Vanilla extract – 1 tsp
Nutritional Facts (Per Serving)
- Calories: 210
- Protein: 3g
- Carbohydrates: 25g
- Fats: 12g
- Fiber: 1g
- Sodium: 100mg
- Sugar: 14g
Instructions
Step 1: Prep Your Station
- Clear your counter and gather all tools (brush, knife, baking pan).
- Pre-measure all ingredients.
- Keep phyllo dough covered with a damp towel.
Step 2: Make the Nut Filling
- Chop pistachios finely.
- Mix with sugar and ground cinnamon.
Step 3: Layer the Phyllo Dough
- Butter your baking pan.
- Place one phyllo sheet in the pan, brush with butter.
- Repeat for 6–8 layers.
Step 4: Add Nut Layers
- Sprinkle a thin layer of nut mixture.
- Add 2–3 sheets of phyllo, brushing with butter between each.
- Repeat layering: nuts, then phyllo + butter, until ingredients are used up.
- Top with 6–8 layers of phyllo, each brushed with butter.
Step 5: Cut Before Baking
- Use a sharp knife to cut the assembled baklava into diamonds or squares.
Step 6: Bake
- Preheat oven to 350°F (175°C).
- Bake for 45–50 minutes, or until golden brown.
Step 7: Prepare the Honey Syrup
- In a saucepan, combine 1 cup sugar, 1 cup water, and 1 cup honey.
- Bring to a boil, then reduce heat and simmer for 10 minutes.
- Add lemon juice and vanilla; let cool slightly.
Step 8: Pour Syrup Over Baked Baklava
- Let baklava cool 5 minutes.
- Drizzle warm syrup evenly over the entire tray.
Step 9: Soak & Serve
- Allow baklava to soak for at least 4 hours or overnight for best flavor.
- Serve with a sprinkle of chopped pistachios or a light honey drizzle.
Pro Tips
- Keep phyllo dough covered to prevent drying.
- Use a very sharp knife to get clean cuts.
- Let syrup be warm (not hot) before pouring it over baklava.
Storage
- Room Temperature: Store in an airtight container for up to 1 week.
- Refrigerate: Keeps fresh for 2 weeks (wrap pieces individually).
- Freeze: Wrap and freeze for up to 2 months. Thaw before serving.


